Creating rich menus
Rich menus are a menu feature shown anchored at the bottom of the LINE chat screen.
They draw users' attention by filling a large portion of the screen. By setting links along with creatives, you can guide users to various other LINE official account features, as well as external sites, reservation pages, and more.
Note: Rich menus are not available on LINE for PC (including the Chrome version).
1. Create a new rich menu.
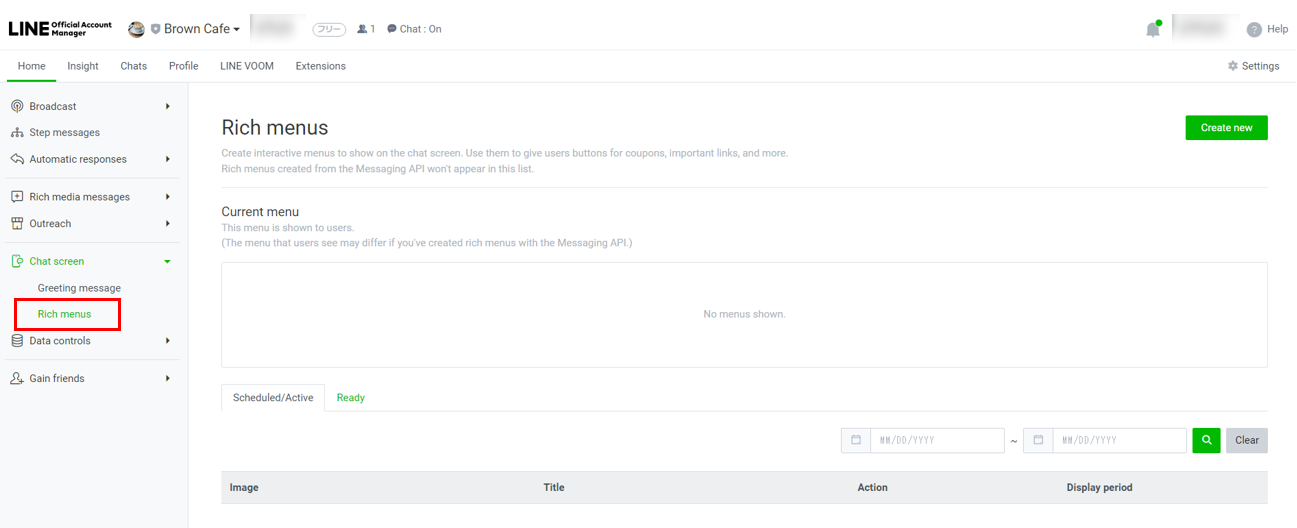
Under Chat screen, select Rich menus. Click Create new at the top right of the screen and you'll be taken to the new rich menu creation screen.
2. Set each field.
| No. | Description | ||||||||||||||||||||
|---|---|---|---|---|---|---|---|---|---|---|---|---|---|---|---|---|---|---|---|---|---|
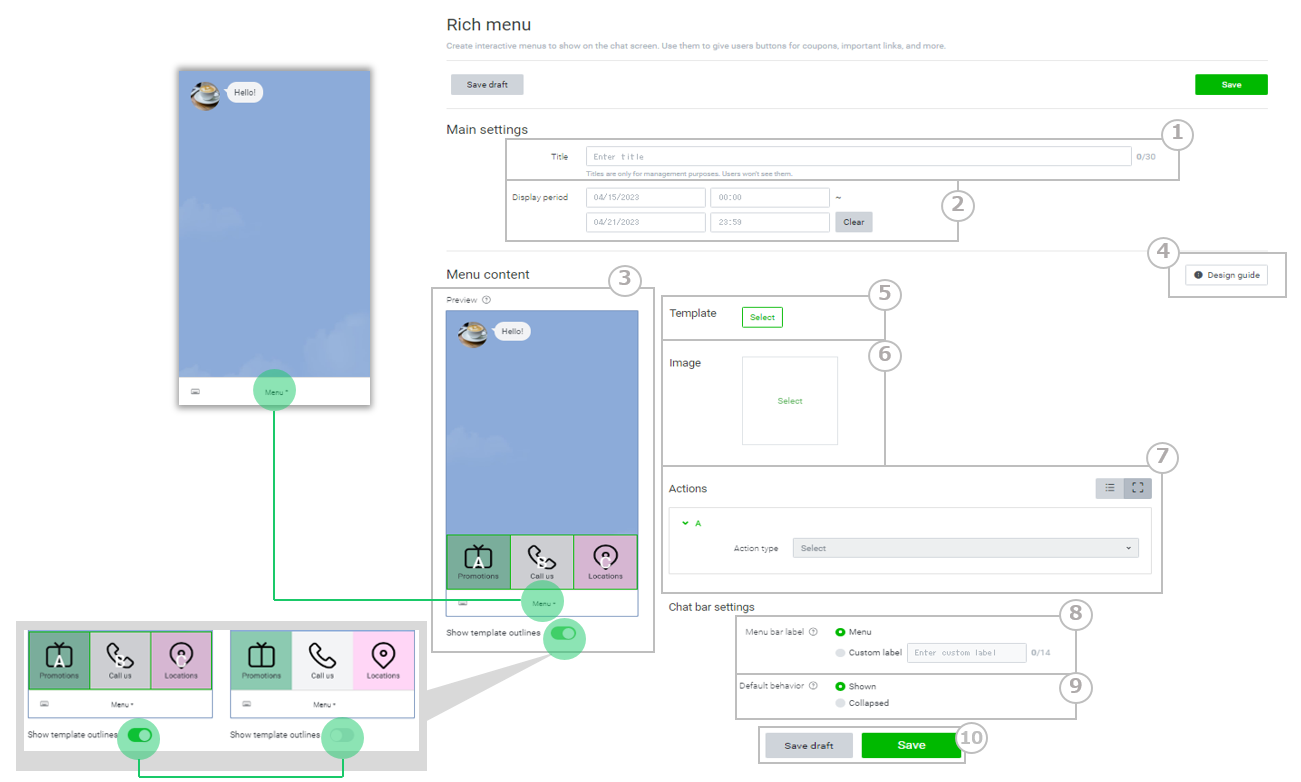
| ① |
You can set a title for management purposes. (This title is not shown to users.) |
||||||||||||||||||||
| ② |
You can set a period for the rich menu to be shown on users' devices. |
||||||||||||||||||||
| ③ |
This is a preview of how the rich menu looks on the chat screen. You can confirm how the rich menu will appear on the chat screen. You can show or hide the rich menu by clicking the Menu button (the menu bar). |
||||||||||||||||||||
| ④ |
You can download templates for creating images that match how your rich menu is divided. Please make use of the ones that match your desired image size. |
||||||||||||||||||||
| ⑤ |
Select this to choose a template for your rich menu. |
||||||||||||||||||||
| ⑥ |
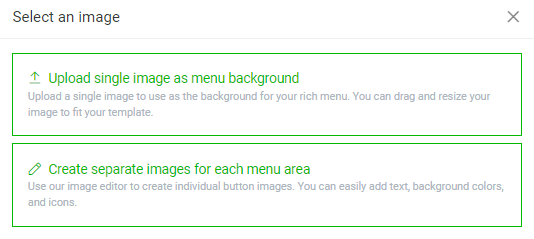
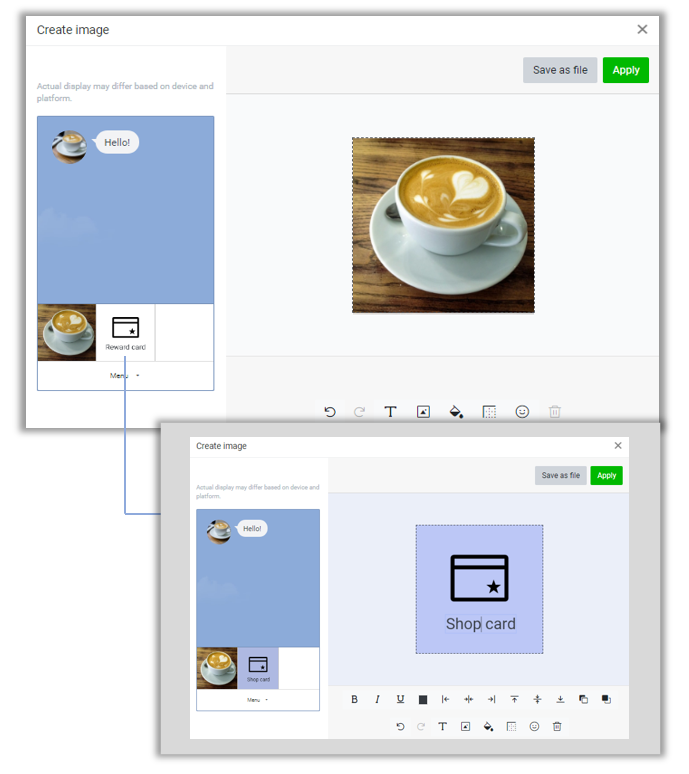
Select this to set the images for your rich menu.
Upload single image as menu background This option lets you upload an image of your choice that's been created to the size of your template.
Create separate images for each menu area Using the tools, you can adjust image sizes to fit the template, use icons, add text and borders, and more.
The Create image feature lets you easily create images that fit rich messages or your rich menu's template using its editing tools. See this page for details. |
||||||||||||||||||||
| ⑦ |
Select this to set actions for the corresponding template sections. |
||||||||||||||||||||
| ⑧
|
This lets you set the text that is shown in the menu bar.
|
||||||||||||||||||||
| ⑨ |
You can set whether the rich menu is shown automatically when a user views the chat. |
||||||||||||||||||||
| ⑩ |
Select Save draft or Save to save the rich menu's settings. Once you finish saving it, it will be displayed in the list. You can edit it again by selecting its title from the list. |


Copying rich menus
You can copy previously created rich menus.
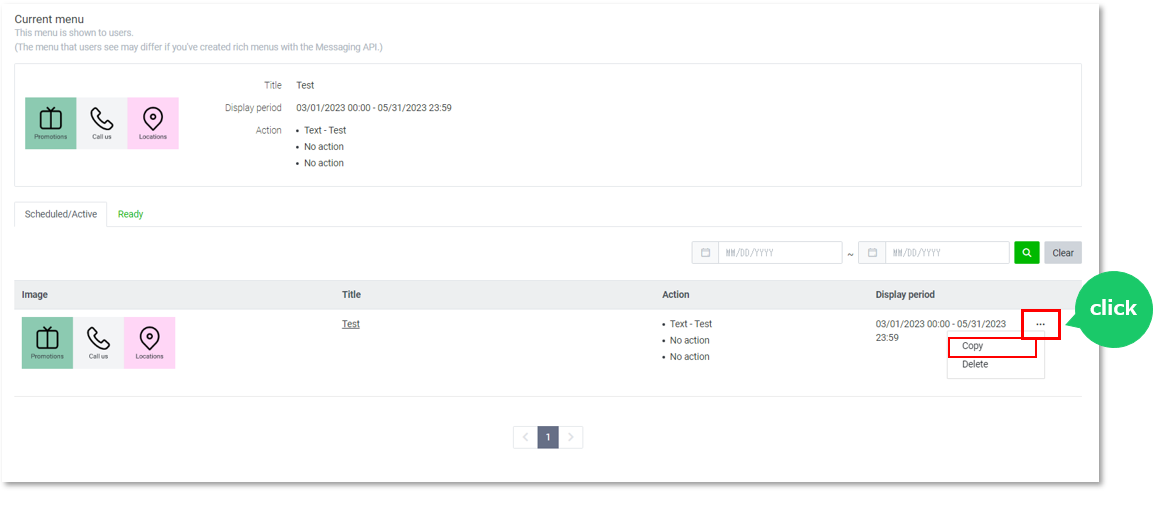
1. Click the menu icon on the rich menu you want to copy, then select Copy.
2. Edit your copied rich menu's settings, the same as when creating a new one, then select either Save draft or Save.
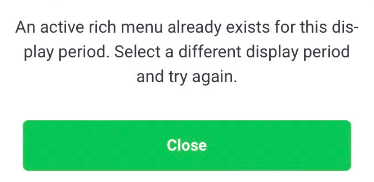
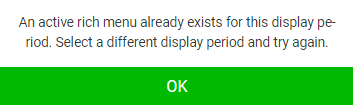
Note: If the copied rich menu's display period overlaps with a rich menu in the Scheduled/Active tab, the following message will be shown and you will not be able to save it. Please either change the display period and save it or save it as a draft.
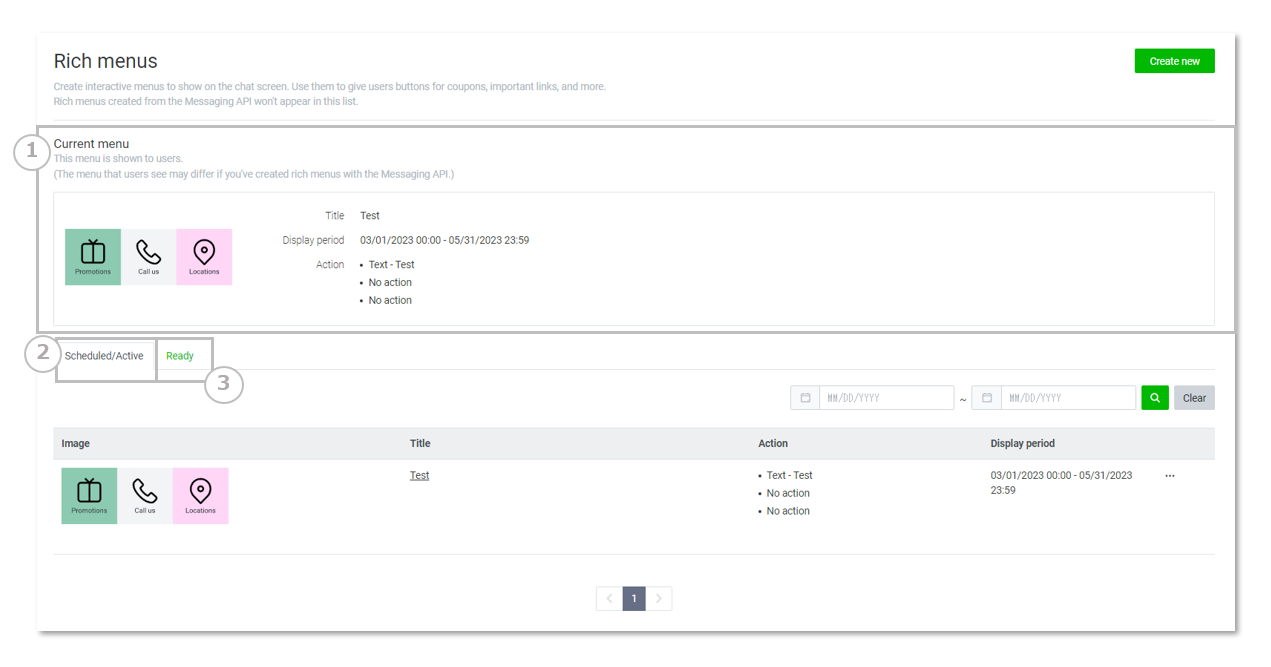
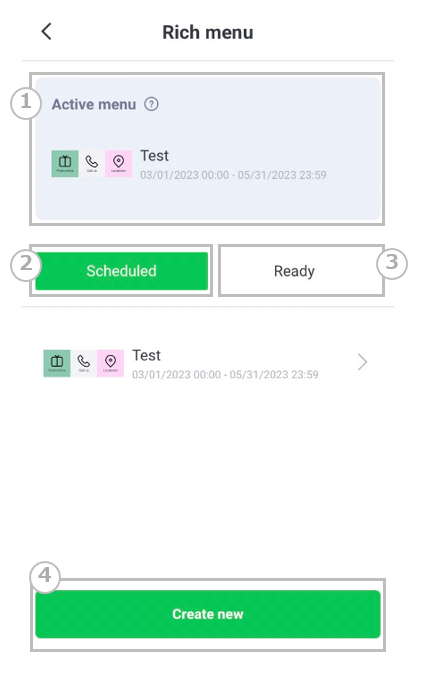
| No. | Description |
|---|---|
| ① |
This is the rich menu currently shown to users. |
| ② |
Your scheduled and active rich menus are shown here. |
| ③ |
Rich menus that are expired or saved as drafts are shown here. |
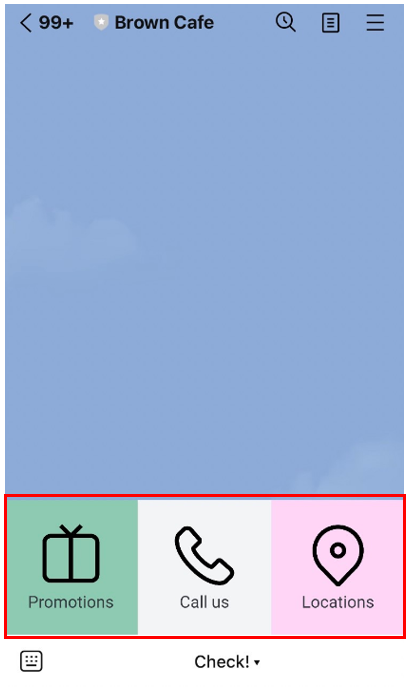
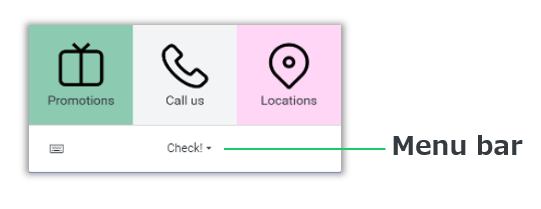
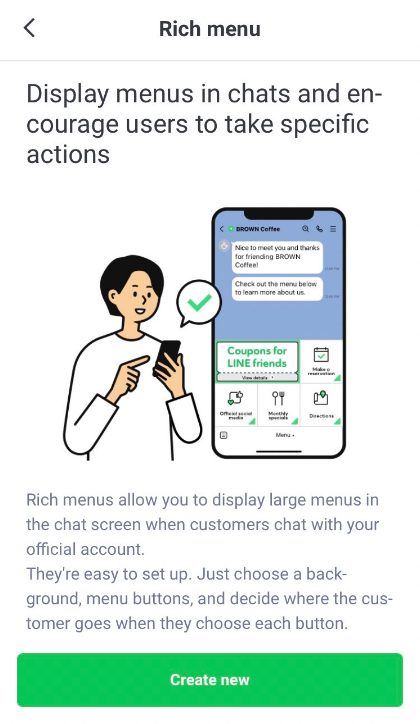
This is the large menu users will see at the bottom of the chat with your LINE official account.
Users can tap menu options to access external links, send preset keywords, and more.
Note: Rich menus are not available on LINE for PC.
-
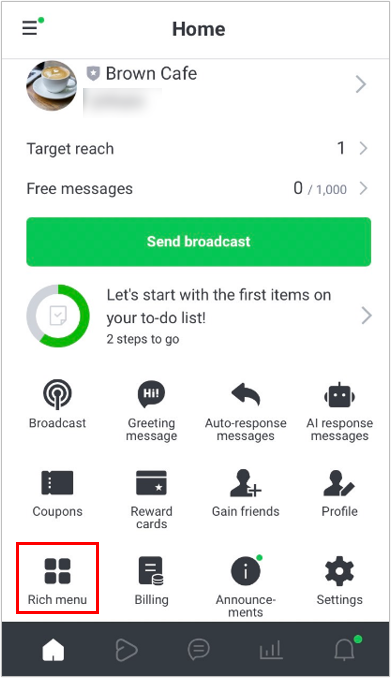
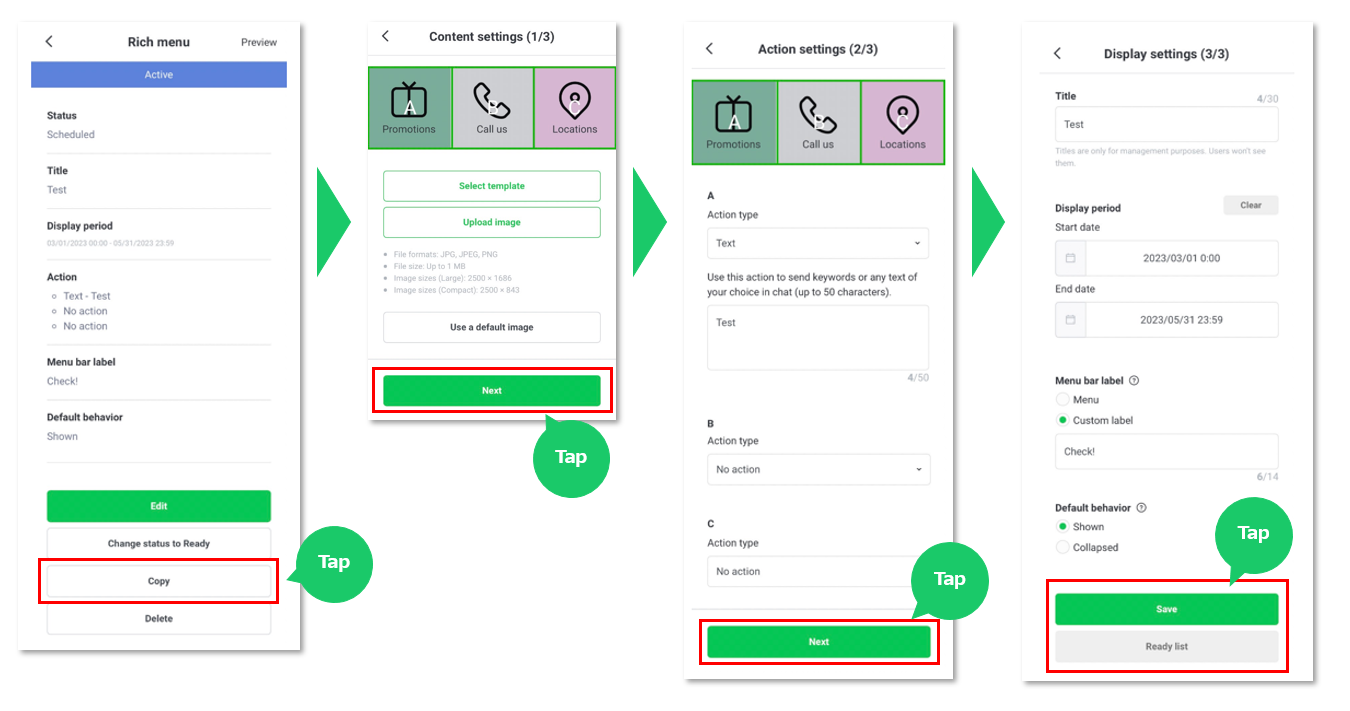
From the menu, select Rich menu, then tap Create new.
-
Select a template.
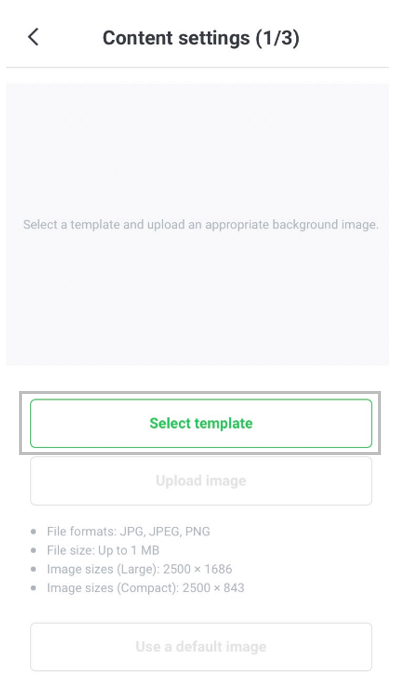
-
Select either Upload image or Use a default image.
Note: The following files can be set as background images.
• File formats: JPG, JPEG, PNG
• File size: Up to 1 MB
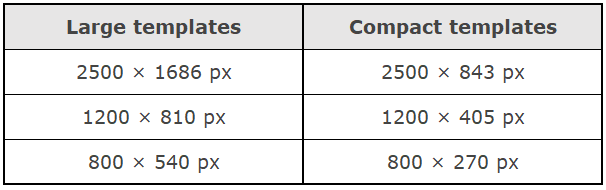
• Image sizes: 2500 × 1686 px or 2500 × 843 px

-
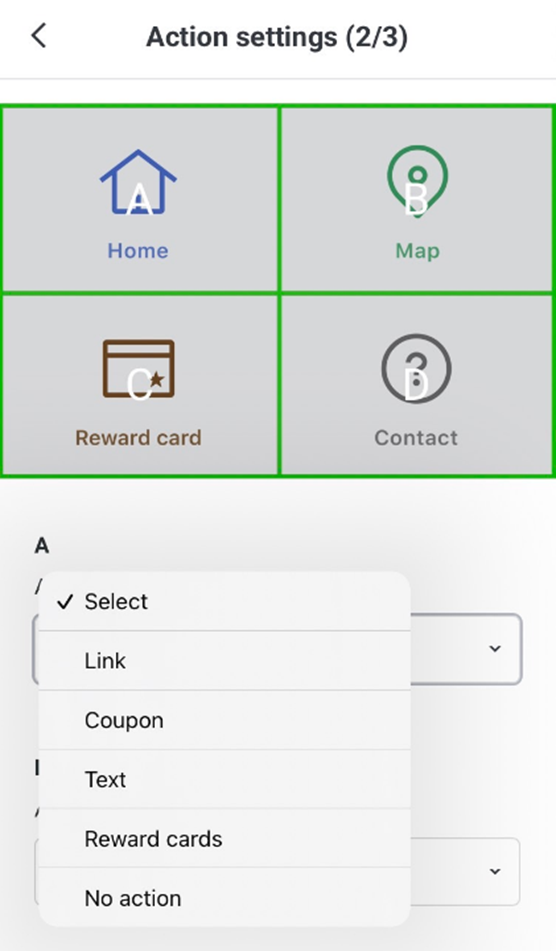
Set actions for the corresponding template sections.
Note:
- You'll need to enter an Action label if you select Link or Coupon.
- Action labels can be up to 20 characters long. Enter an explanation or summary of the setting. This will be used by the OS's screen reading feature.
- You cannot set them all to No action.
- Please refrain from using content that induces users to tap the menu repeatedly.
-
Set the rich menu's Display settings.
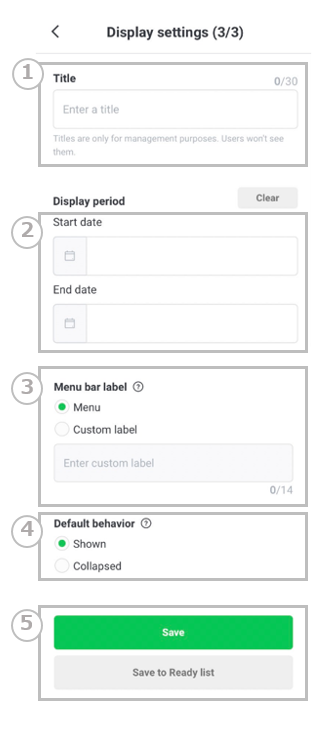
No. Description ① You can set a title for management purposes. (This title is not shown to users.) ② You can set a period for the rich menu to be shown on users' devices.
Note: Due to server processing issues, there is a delay in changes being visible to users. This delay varies based on network traffic and your account's number of friends.③ This lets you set the text that is shown in the menu bar. ④ You can set the rich menu to automatically be shown when a user enters the chat. ⑤ After you've set up your rich menu, tap Save.
The rich menu will be shown to users if it's during the display period. If its display period is set to a future period, it will be shown in the Scheduled list.
If you tap Save to Ready list, it will be saved as a draft in Ready.
Upload an image of your choice from Upload image. For rich menus, you need to set one image as the background, as opposed to setting separate images for each section of the template. For this reason, you will need to adjust an image to fit the size of your selected template beforehand.
You can upload an image of one of the following six sizes.
The Create image feature lets you easily create images that fit rich messages or your rich menu's template using its editing tools.
See this page for details.
| No. | Description |
|---|---|
| ① |
This is the rich menu currently shown to users. |
| ② |
Scheduled rich menus are shown here. |
| ③ | Rich menus that are expired or saved as drafts are shown here. |
| ④ | Tap here to create a new rich menu。 |
You can copy previously created rich menus.
1. Tap the rich menu you want to copy, then select Copy.
2. Edit the rich menu's settings, the same as when creating a new one, then tap Next to proceed to the next screen.
3. At the last editing screen, choose either Save or Ready list.
Note: If the copied rich menu's display period overlaps with a rich menu in the Scheduled tab, the following message will be shown and you will not be able to save it. Please either change the display period and save it or move it to the Ready list.